Background:
This document details the required configuration steps to
take in Okta Single Sign On and Cloud Protection Manager(CPM). It walks you
through creating a new Application to use with Okta. Please note that integration with CPM and Okta is supported
only for
Advanced, Enterprise, and custom
versions of CPM. The process has three sections you must configure to get
this working correctly.
I. Okta Settings
II. CPM Settings
III. AWS Settings
I. Okta Settings
1. Please login into the Okta program and select Admin in top right hand corner. Then select "Add Applications"
2. Click on Create New App Button.
3. Please select the platform as "Web" and select SAML 2.0 click Create.
4. Please enter the App name as shown N2WS Cloud
Protection Manager (logo is optional). Click
Next.
5. Add the CPM settings to Okta on SAML Settings screen using the table below.
The following fields in the General tab need to edited:
Okta Settings field
| Value
|
Single
Sign on URL
| https://<CPM_Address>/remote_auth/complete_login/
|
Audience
URI SP Entity ID
| https://<CPM_Address>/remote_auth/metadata
|
Name
ID format
| Unspecified
|
Signature
Algorithm
| RSA-SHA256
|
Digest
Algorithm
| SHA256
|
Enable
Single Logout *
| Check
the box
|
Single
Logout URL
| https://<CPM_Address>/remote_auth/complete_logout/
|
Signature
Certificate
| Browse
to CPM certificate and upload to Okta Server.
|
Authentication
Context Class
| PasswordProtectedTransport
|
Where CPM_Address = The FQDN or IP
Address of the CPM instance. Please do not mix IP address and FQDN in settings or errors will occur.
NOTE: Make sure you enable single
logout checkbox and check the show Advanced settings button to see all Okta Values.
Make sure you upload the CPM certificate to the Okta Server which can be downloaded from the General Settings, Identity Provider Screen. Click on Download CPM Certificate button.
Add the following group attribute and Attribute Statements:
ATTRIBUTE
STATEMENTS
Name Name Format Value
cpm_user_permissions Basic User.cpm_custom_attribute
GROUP
ATTRIBUTE STATEMENTS
Name Name
Format Filter
cpm_user_groups Unspecified Starts with: cpm_
5a. Please then click the Next button to finish
6. Please go to the Sign on tab and hit the View Setup Instructions button in the middle of the screen.
From here you will copy out the Okta settings to enter into the CPM Identity Provider screen.
The settings you need to copy are:
Identity Provider Single Sign-On URL:
Identity Provider Single Logout URL:
Identity Provider Issuer:
The following table shows the CPM Settings and the Okta settings they map to:
NOTE: Make sure you download the Okta Certificate and you will need to add it to the CPM instance.
7. This is what you will see in the next screen copy the values discussed in step 6.
Make sure to download the Okta certificate and upload it to the CPM instance under General Settings, Identity Provider, X509 cert: ,Choose File.
8. At the top of the Okta screen select Directory,
then Groups (if not done in previous step).
Please Click on add Group and name it
cpm_users Once you add it you should have a new group.
Note: The group name can be anything on the Okta side as long as it has the prefix cpm_ . Then you add a CPM with the group name without adding the cpm_.
for example if you add cpm_awsadmins you would add a corresponding group in CPM named awsadmins.
9. Now Click on the newly created group named "cpm_users"
10. Please click on "Manage People" button.
In my example I added two users - "John Smith" and "cpm" . You can add the desired users by hitting the "plus sign" next to the name. Please save after adding the users that will access Cloud Protection Manager. For more details on
adding users and groups please see this Okta article.
12. Please choose Applications at the top of the screen and in the drop down select Applications.
13. In The Applications screen click the Assign Applications button.
14. Please check the box in front of the application Cloud Protection Manager (CPM). Then on the right side of the screen choose users and select Next.
15. Click on Confirm Assignments button.
II. CPM Settings
1. Please open the CPM Manager screen and choose General Settings, Identity
Provider, Enable ".
Then enter the proper settings. Please obtain them
from under Applications in Okta and get to the CPM application you added in previous steps. Select Sign on tab, Click on “View Setup Instructions”.
This screen you will copy 4 items that are in red boxes:
2. Please open the CPM Manager and at the top of the screen hit the “General
Settings“ button.
3. Then change "Identity Provider" option to enabled.
4. Please expand Identity Provider section.Click
add Group and add a group named "users””. The effect that adding users to the group cpm_users group in Okta limits access to the root/admin user’s accounts and policies.
You also have the option of using "default_root_delegates”, (create corresponding group named: "cpm_default_root_deletagtes" and add users to that IDP group.)
This is usually done to make IDP user be able to see the root/admin user accounts and Policies in CPM.
Note: Do not add IDP/Okta users to both groups as it can cause this process to fail.
For more details on adding groups to Cloud Protection Manager see the CPM User Guide.
5. Name the group “users”, set enabled to “Yes”set the User type to “Managed”,
set allow File level recovery To “Yes”.
Then click the Add
button.
Note: The other values can be set to values that meet your deployment stitution.
If you leave the fields blank it is unrestricted.
6. Please enter the URL information for the fields which you should have gathered at step 1 under CPM Settings.
Note: Please use caution if you are copying and
pasting URL’s as sometimes there is
a space added either behind
or in front of the pasted URL and will
cause connection errors.
Note: Ensure that you use the IP
address of CPM and Okta Server, or the
FQDN of CPM and Okta Server.
Please don't use IP address on one side and FQDN on the other.
Change the CPM IP or DNS: field to Custom Ip or DNS please enter the FQDN of the CPM instance in space provided below.
Please Copy the otka settings to the corresponding CPM Field in Identity Provider using the chart below.
NOTE:. Please make sure to upload the Okta Certificate to the Cloud Protection Manager instance and select browse open the file and then hit the APPLY button.
CPM
|
Okta
settings
|
Entity
ID:
|
Identity
Provider Issuer
|
Sign
on URL
|
Identity
Provider Single Sign-On URL
|
Sign
Out URL
|
Identity
Provider Single Logout URL
|
7. When this is completed the Identity Provider screen will look something like this:
Then its very Important to hit APPLY for this to take effect. Then test hit the test connection button.
8. You should see a successful login message. Please hit the button "Close the page".
9. Please go to the Okta application and select My Applications
then click On the Cloud Protection icon (CPM).
10. You see a login screen like this:
11. Then it should progress to CPM Manager screen.
Note: At this point you may be able to connect to CPM Manager screen but may not be able to do anything until The AWS portion of the configuration is completed in section 3. If you used the CPM group "default_root_delegates" and on the IDP side created "default_root_delegates" group you should not have to complete section
below.

III. AWS settings to use for Accessing Resources
The AWS and Cloud
Protection Manager settings allow you to flexibly assign permissions to CPM using one of three Authentication methods.
1. Add a specific User and associate it with
CPM
2. Use an Existing IAM Role
3. Assume Role
Recommendations:
Following AWS Security Policy recommendations of adding the least possible permissions it is more advisable to utilize the AWS Role authentication method.This allows you to tailor access according to your specific Security requirements. The use of a IAM User although supported is being depreciated by AWS in the future. It is then advisable to use the IAM Role or Assume Role Authentication moving forward.
For more details on Authentication methods supported by CPM please see the CPM User Guide in section 3.2.2 Authentication. CPM User Guide Setting up a new user.
1. Please login to the AWS Console, select Services. Go to IAM, Select Users in left hand side of screen, then hot Add User.
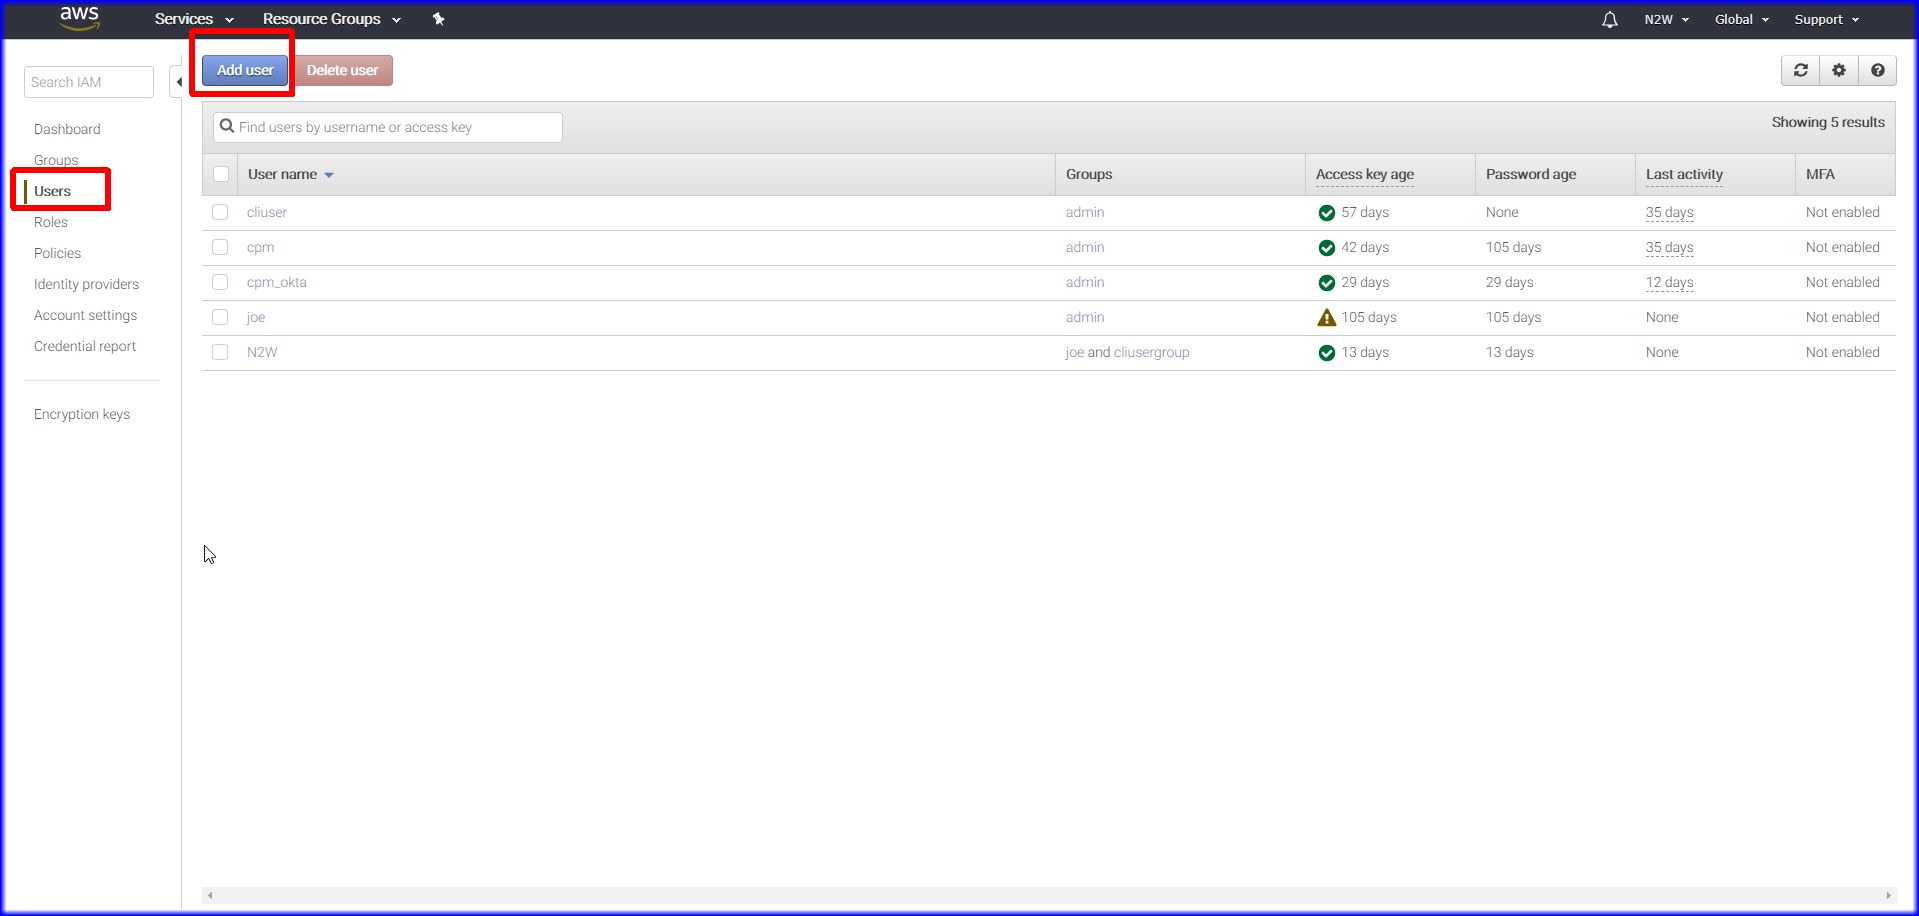 2. Name the account and checked the two checkboxes "programmable access" and "Console Access"
3. Click "Next Permissions button" at bottom of screen.
4. Please choose Attach existing Policies directly .
5. Click Create Policy button
NOTE: Please visit this link to download the json files which you will need to complete the next step.
The link has at the bottom of the page an attachment entitled "minimal_iam_policies_for_cpm_230.zip".
After you download it extract the contents to a folder you can locate easily .Then locate the file called 2.3.0_permissions_all.json and open that in notepad,
6. Now select the Visual Editor tab which it should be on by default and select the following
Service: EC2
Actions: Check the boxnext to All EC2 actions (EC2*)
Resources: Choose All Resources
7. Please select the json tab and select all text (all text in the red box below) in that tab and delete it.
9. Go to notepad and if not already open , please open the file named 2.3.0_permissions_all.json and then copy the entire contents and paste it into the json tab so that it looks like the screenshot below. Then click on the Review Policy button at the bottom of the screen.
8. Please name the policy cpm_access or something else that will be easily identifiable. Then click the Create Policy button.
9. Please search for the newly created policy "cpm_access" and select it in the list and then hit the Review policy button at the bottom of the screen.
10. Please click on "Create User button".
11. Please make sure you download the credentials file by hitting the Download .csv button. This is the only time AWS allows you to download them without creating a new user.
12. Please open the downloaded credentials file and copy the access
key id and Secret access key you will need them in the subsequent steps.
13. Please login to the Cloud protection Manager Screen as the IDP user to
which he wants to add the account.( in below example "johnsmith").
15. Select at the top of the screen the "Accounts" button.
16. Please add any "IDP users" in the below example "JaneDoe" to the user johnsmith. then in the "Name" field enter "janeDoe". Add the Account Type as Backup.
The Authentication should be set to "IAM User" and enter " the "Access key ID" and the "Secret Access Key" of the johnsmith AWS account. Then hit the "Add" button.
17. The user ("JaneDoe") will show up under the account of "johnsmith". you can add as many IDP users as need access to CPM.
Please verify that you can successfully connect with the Test Connection under CPM's Identity Provider screen and check if the user can connect via Okta.
Using The Assume Role method of AWS Authentication:
1. Please open the AWS Console and select Services at top of screen and then browse under Security,Identity& Compliance,select IAM.Please then click in left hand pane on Roles:
2. Click create Create Role:
3. In Step one of the Create Role screen please click under "Select Type of trusted entity" and choose "AWS service" Please select under "Choose the Service that will use this role" , EC2. Then click Next Permissions button.
4. You now have the option to select an existing Policy for example AdministratorAccess or click Create Policy", click "Next Review" if existing policy.
Choose the following options in the Visual Editor:
Service : EC2
Actions: Under Manual Actions select all EC2 actions (ec2).
Resources: Please click on all Resources.
5. If you have not done so previously please visit this link to review the minimum account permissions necessary for CPM to function properly. CPM Permissions You should also download the file under attachments entitled "minimal_iam_policies_for_cpm_230.zip". Please unzip the files and you will use the file named "2.3.0_permissions_all.json".
6. Please select the json tab. Now select all text and delete all the text starting with the "{" and ending with the "}" in the json tab. The text that needs to be deleted is in red below.
7. Copy and paste the entire contents of the file extracted named "2.3.0_permissions_all.json" into the json tab.
Please click Review Policy.
8. Please name the policy on the Review Policy screen something you can easily identify. In this example we named it "cpmaccesspolicy".
It is optional to add a description and then please select "Create policy" at the bottom of the screen.
9. Please then select "Policies" on the left hand pane and the under the Filter section type "cpm" to locate the newly added policy, then select it.
10. Please select at the top of the screen "Policy Actions", then click "Attach".
11. Please select "Attached Entities" tab and select the user/groups you want to attach the policy to. Then click "attach policy".
12. In AWS IAM select Roles in left hand and then please either Search for the role you created or just click on it.
13. Please select the "Trust Relationships Tab". Then hit the edit Trusts button.
14. Please locate the AWS arn number for the account you want to assume. Substitute the 12 digit AWS account number where the "############" is. Then click on the Update policy button at the bottom of the screen.
15. Make sure that you see under trusted entities the account number added in previous step.
16. Please go back to the Cloud Protector Manager go to Accounts, and add new accounts, Please enter under the User field "johnsmith"
and then in the Name field add the IDP user (in this example "JameDoe"). See chart below for other settings.
Change the following setting to the proper value per table below then click Update.
CPM Setting
| Value
|
User
| johnsmith
|
Name
| Account you added in AWS in this example
“JaneDoe”.
|
Account
Type
| Backup
|
Authentication
| Please
select Assume Role.
|
Account
number
| Put the 12-digit AWS account number of
the target account (no hyphens).
|
Role
to Assume
| In the Role to Assume box, type the role name, not the full Amazon
Resource Name (ARN) of the role. CPM cannot automatically determine what
the role name is, since it is defined at the target account, which CPM has no
access to yet. In the above example its CPM2.
|
External
ID
| Leave blank unless the cross-account
role was created with a 3rd party option.
|
Assuming
Account
| johnsmith
|
Scan
Resources
| Enable and select regions
|
17. Please test the Okta sign in by connecting to the Cloud Protection Manager and select "Sign in with: Identity Provider".
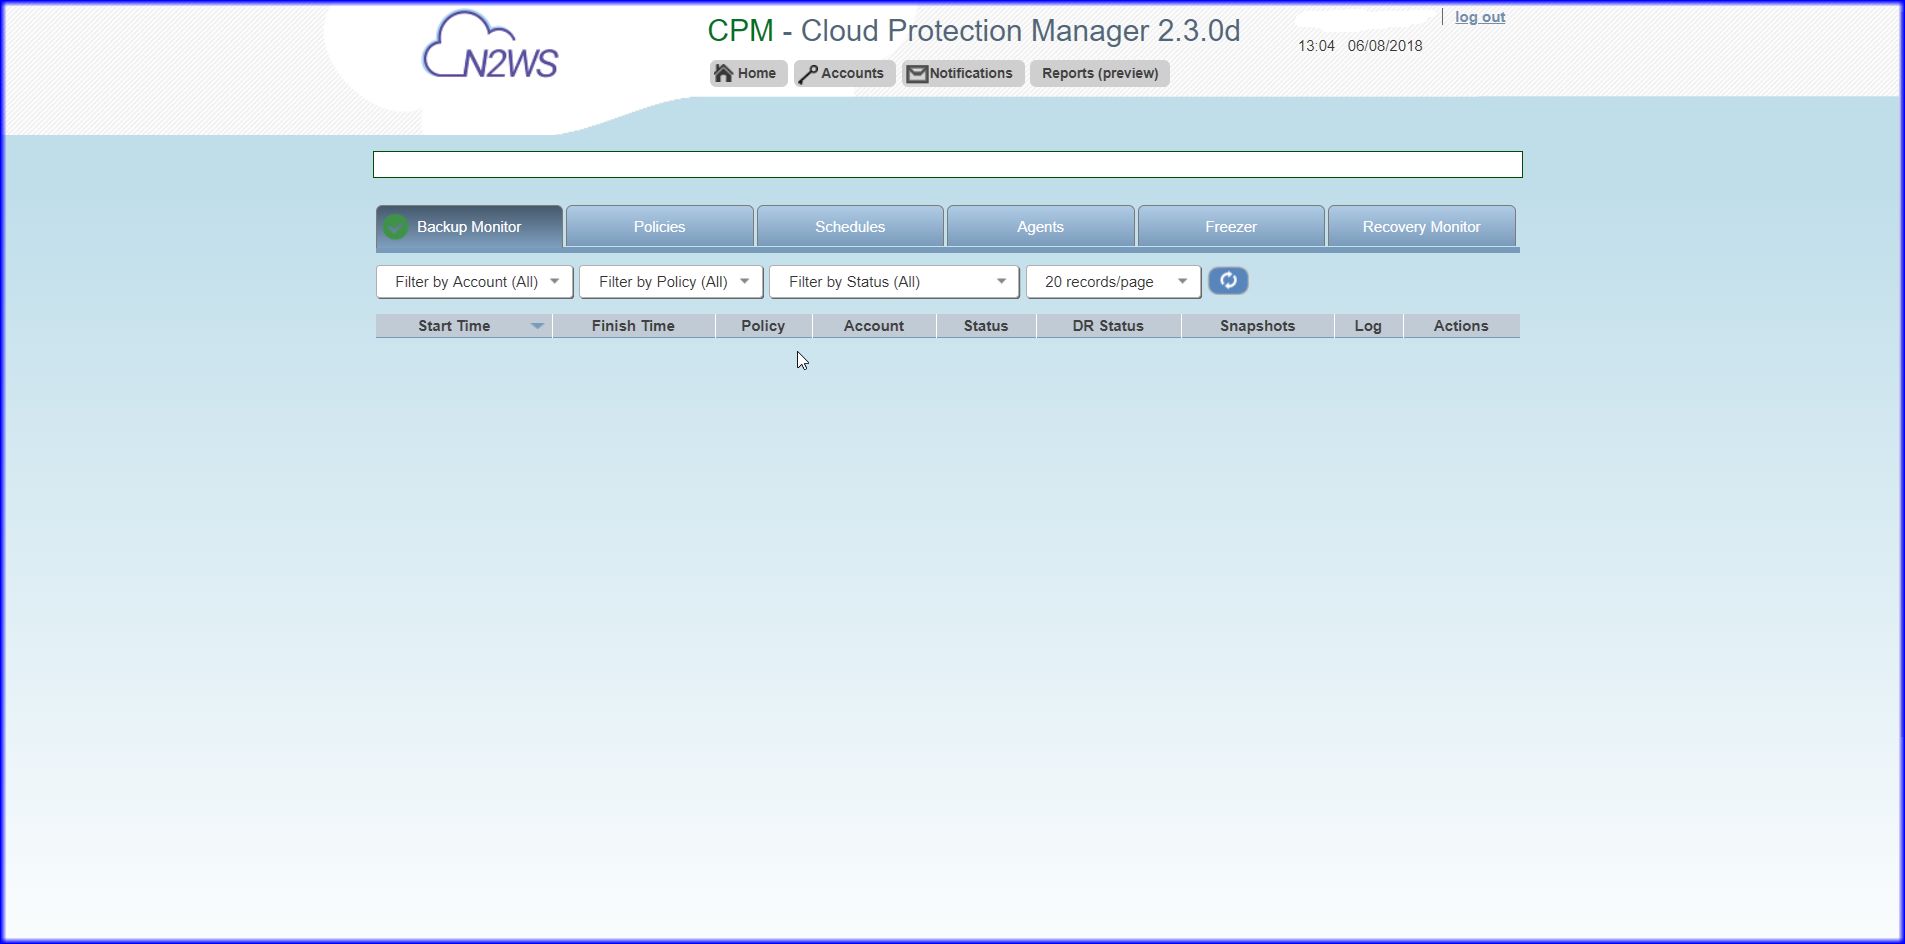
18. This will bring you to the non root account (compare non root vs admin/root login screens below) page. These accounts will only
have Home, Accounts, Notifications, and the Reports tabs. These members of this group
will be limited to accessing their own Accounts and Policies.
Note: The admin/root post login screen will have additional buttons at the top of the screen which only available to the root account.
They include: Users and General settings.